Table of Contents
- Net10 vs Tracfone: Which Pay-as-you-go Phone is Best? - March 29, 2020
- The Best Tracfone for Seniors On The Market! - February 28, 2020
- The Boost Oxygen Review: How Does it Work? - October 2, 2019
An unfortunate fact of getting older is the slow deterioration of your sense of balance. Even though it happens to everybody, it’s hard to pinpoint exactly when it starts. But it’s important to counteract so you don’t wind up in the hospital with a broken bone or worse.
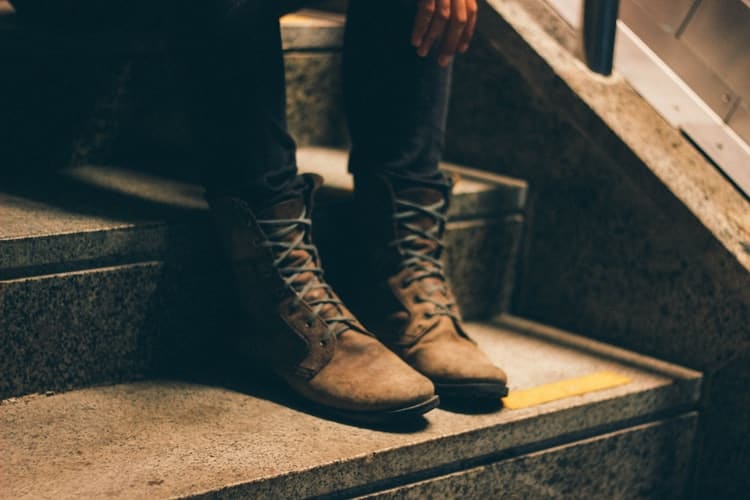
One easy and effective way to guard against falls as a senior citizen is to make the bottoms of your shoes work with you instead of against you. That means adding grip to the soles so they don’t slip around on dangerous surfaces and send you flying. Making your shoes steadier can mean the difference between going on the trip of a lifetime and a trip to the hospital.
Read on to find out how you can make this simple upgrade to your life!
Why should I make my shoes grippier myself?
Besides the general safety factor, there are a number of reasons to DIY your shoe soles into a better grip.
- Mobility. When you’re not afraid of falling, you’re much more likely to move around and get a healthy amount of activity in your life. The more consistent movement has well known aerobic exercise effects such as increasing heart and lung capacity and keeping obesity and diabetes at bay. But it’s also good for your mental health. If you’re able to do your favorite activities with confidence, you’re much more likely to beat depression and keep a varied social life, two things that are very important but can be challenging for seniors as their mobility slows.
- Overall health. Did you know that the health of your feet is a major factor in how the rest of your body works? If your feet become weak, the rest of your body starts to compensate for them. That means that if you’re not leaning as much on your feet as you should – if, for example, you are scared of falling and so walk differently than you used to – your knees, back, and other areas associated with walking will get overworked. That can lead to soreness and strain in joints and muscles that are doing the compensating. So shoe grips let you stroll with confidence that everything in your body is doing a great job.
- Cost. Any kind of specialized clothing item is going to cost more than their unaltered counterparts, and shoes are no exception. There are some great shoes that emphasize grip out there, specifically for seniors or not, but adding grips to your current shoes helps you keep your budget tight.
- Familiarity. Shopping for new shoes is a pain. There’s no getting around either a lengthy trying on session in person or an ultimate guessing game when shopping online. And many new shoes need some sort of breaking in period, which in many cases result in nothing more than blisters and the need to start over at square one. Putting grips on the soles of your own shoes eliminates all that hassle. Your favorite shoes already have the exact shape, cushion, and feel molded to your specific feet after years of getting to know each other, and adding grips to their soles doesn’t alter any of that. It makes something already good into something great.
- Ease of application. Even if you’re not a regular crafter or maker, putting grips on your shoes is super easy. The folks who manufacture them know their audience’s needs and the variety of skill sets coming to this type of project, so they make it foolproof. We’ll get into more details about the process itself below.
- Touchups. With a new pair of shoes specially built for better grip, the whole shoe becomes useless once the sole wears down into something smoother. That usually requires buying a whole new pair of shoes. But if you’re adding non-stick grip to your shoes yourself, you can identify the section that’s worn down and replace it. This targeted repair makes sure you keep your grip fresh while not sacrificing the personalized fit you’ve gotten settled into your shoe or the time and money it would take to replace the whole thing.
How can I make my shoes grip more?
- Scuff or abrade the soles. It might feel weird to deliberately damage something you would normally take care to keep nice. But scuffing the soles of your shoes is by far the simplest and cheapest way to add traction. Scuffing means to mark a surface by scraping or brushing it, and it scratches shoes over the time of general wear and tear. If you want to fast forward to the part where your sole has better grip but without all the waiting and hoping the right spots will get scuffed, just do it yourself. Nail files and sandpaper are both perfect tools for scuffing soles, which will wear down the slick bottoms of your shoes without messing up any other part. DIY scuffing and abrading keeps you looking snazzy while keeping you safe.
- Spray the soles with hairspray. Another way to get more grip using things you more than likely already have at home is to spray the soles of your shoes with hairspray. Hairspray is designed to keep your ‘do in place, and because of that, it contains vegetable gums, gum Arabic, and other chemical ingredients that stick to surfaces without damaging them until they’re washed off. Plus, hairspray is sold in aerosol cans, which means it’s incredibly easy to spray directly onto the soles of your shoes without needing any extra steps to stay in place. Be advised, though, that if you use this method to add non-stick surface to your shoe soles, you will need to reapply more frequently than other methods. Do some testing in the safety of your own home where you know you won’t injure yourself if you slide before you take this hack out on the road.
- Use puff paint. If you’re into crafts, you may have used puff paint to make designs stand out on a t-shirt or canvas bag. You can also use it to draw a sort of second, more non-slip sole on your shoes. It typically comes in bottles that have narrow nozzles, so you can either use those to draw patterns or take off the nozzles and spread the paint in a layer with a knife or craft spatula. Either way, it will harden into a baked-clay consistency that adds a non-slip layer to wherever you paint. This is probably the messiest DIY method for adding a non-slip layer to your shoe soles, but it can also be the most fun!
- Attach non-slip shoe accessories to your soles. We understand that not everybody has the time, energy, or inclination to do their own modifications to their shoes. That’s totally fair – and shoe accessory companies have you covered. There are a number of ways you can add professional non-slip surfaces to the soles of your existing shoes so you can get the best of help without giving up your favorite pairs. Below, we go into details on the types of no-slip accessories you can buy for your shoes.
What types of non-slip shoe accessories are available?
The world of mobility assistance accessories can get overwhelming if you don’t know specifically what you’re looking for. So here’s a starting guide to the kind of no-slip shoe products you’ll see when looking for your own.
- Chain cleats. Originally designed for people of all ages who have to walk on ice or other weather slicked-surfaces, chain cleats look and act a lot like snow chains on tires. They are a series of crisscrossing steel chains studded with spikes that attach to a rubber bootie collar. That rubber collar is pulled over the sole of your shoe until it rests right below your laces, pulling the chains and spikes tight so they become your walking surface. The spikes dig into the ground as you walk, giving you forward traction and keeping you from sliding side to side to prevent the chance of taking a misstep and losing your balance. These are easy to wear, thin and lightweight, tough, and just need to be rinsed off with water to keep clean. They also come in a variety of sizes and spike densities so you can find the exact fit and surface that best suits your situation.
- Rubber cleats. These are similar to chain cleats except, as you can guess, they’re made of rubber instead of stainless steel. They’re a notch cheaper, and if you don’t need something quite as heavy-duty as chain cleats, rubber is a great option. They’ve also still got a rust-proof metal on the bottom of their spikes, which is important to realize because that makes them unsafe for smoothed ice. However, they’re still great for a variety of rough surfaces that may give you balance issues.
- Stretch to fit grips. If you want the same type of grip that pullover cleats give you but don’t want as much shoe coverage, check to outstretch to fit grips. These have thinner connecting pieces that fit right over your toes and heels, and they snap right into place to fit your specific shoe like an elastic waistband. That way you don’t have to worry about adjusting to any changes in your shoe shape or size; that automatically happens with the form-fitting rubber. They come with extra studs, too, and you can buy multipacks to keep a stash ready at all times. But be aware that these are not going to give you a good grip for tile flooring. If you’re looking for something to steady yourself in the bathroom or kitchen while you’re at home, get another type of non-slip assistance.
- Nonslip pads. One of the most versatile ways to add a non-slip surface to your soles, non-slip pads are extremely popular with people of all ages who walk in high heels. They come as pads with one side coated in adhesive; you peel them open and stick them on like plastic bandages. Generally, they’re made in the shape of a full-sole shoe, but you can cut them into any shape you need for the shoe you want, which is great for soles that have arches that don’t touch the ground but ball and heel areas that do. You want to make sure you’re getting the best quality of nonslip pads – they’re easy and cheap to manufacture so there are a lot of options out there. If you get a set that starts sliding around your soles after you wear them for a while, you can upgrade them with spots of superglue to keep them in place, or you can just grab a new pair since they’re so cheap.
- Overshoes. You probably recognize these sort of booties as a requirement for certain areas of hospitals or other places that have to be protected from the material you bring in on your shoes. But you may not have realized that these overshoe covers play a vital part in keeping wearers from slipping as well. You’ll want to get a pair that’s specifically designed for no-slip shoe wear so that you can take advantage of repeated use. They fit over your shoes like shower caps, and their outer finish of polyurethane is a foolproof water barrier as well. If they get too dirty, just throw them in your washing machine with your laundry, or hand dries them at a sink, let them dry, and they’re good as new. Putting them on and taking them off is easy for those who don’t have the motor control or range of motion to tighten straps or adjust buckles. They are not suitable for outside wear, but they’re great for those who are worried about slipping inside.
- Spray pads. These work just like the DIY example of hairspray that we talked about, except they’re specifically formulated for materials that are common in shoes. Make sure you do your research to find the type that is compatible with your sole – sometimes that’s constructed from a completely different material than the rest of your shoe. And remember that these do not have the power to actually anchor you in the ground as cleats do. But that’s a great advantage if you’re looking for no-slip coverage on a surface that you don’t want to damage, such as restored hardwood floors or newly mopped tile.
What do I need to consider when making my shoes non-slip?

There are several factors to keep in mind as you’re choosing a way to make your shoes non-slip and keep them that way.
- Be honest with yourself about your capabilities. There are a lot of options out there because manufacturers recognize that there is a wide range of mobility amongst seniors, even those of the same age and life circumstances. If you love custom creating your own solutions, a DIY method may be your best bet; if you struggle with arthritis or other mobility pain or restrictions, you should consider methods that don’t require fine-tuned adjustments to fit right. Remember, these non-slip methods are here to work for you and your needs.
- Check on your no-slip additions often. No matter whether you did it yourself or bought a premade accessory, keep a sharp eye out for any signs of wear and tear on your no-slip product or method. We picked all of these for their longevity, but none of them are indestructible, and even the most sedate use will cause natural wear on the soles. And uneven wear on the soles of your shoes can push you off balance just as fast as a slick patch of ice.
- Adjust your methods to your environment. As you’ve noticed in our explanations of various no-slip methods, some are much more suitable to outdoors than inside, and vice versa. If you vary your location a lot and want to keep your grip on your balance everywhere you go, you should switch up your no-slip to suit the change. Many outdoor methods, such as chain and rubber cleats, are extremely portable and cheap enough to use alongside a method that is kinder to home interiors like overshoes.
Making the soles of your current shoe no-slip is an easy way to save money and avoid the awkward breaking-in period of a new pair. With any of these methods, you’re adding a layer of safety and security to every step you take.
Further read: